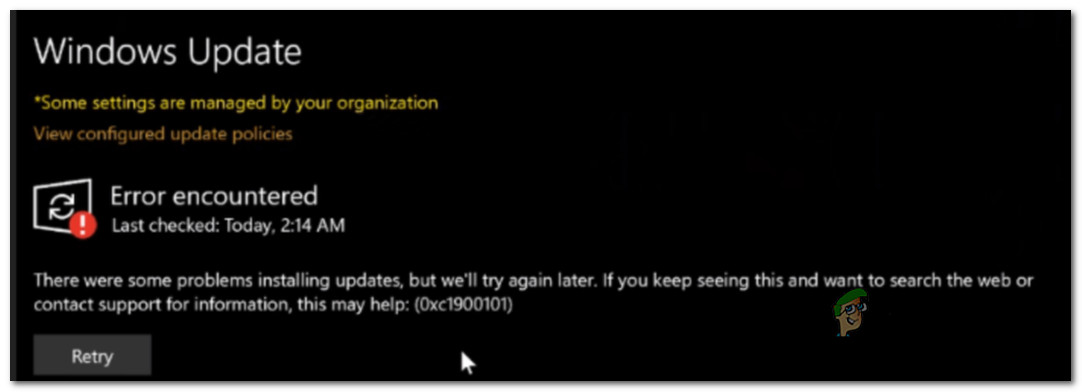
After investigating this issue thoroughly, we discovered a few commons scenarios that might be responsible for triggering this error in the middle of upgrading to Windows 11. Here’s a list of culprits that you might want to troubleshoot against: Now that you are aware of every potential cause that might end up triggering the 0xC19001-0x40021 error, here’s a list of methods that other users finding themselves in a similar scenario have successfully used to bypass it and upgrade to Windows 11 with no issues.
Check if the hardware is compatible with Windows 11
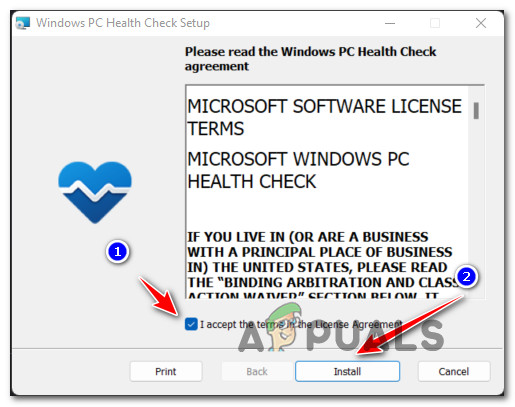
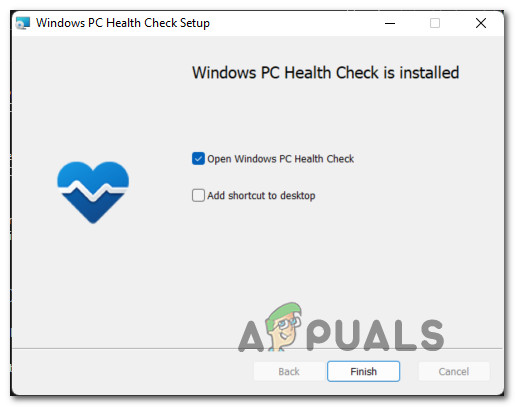
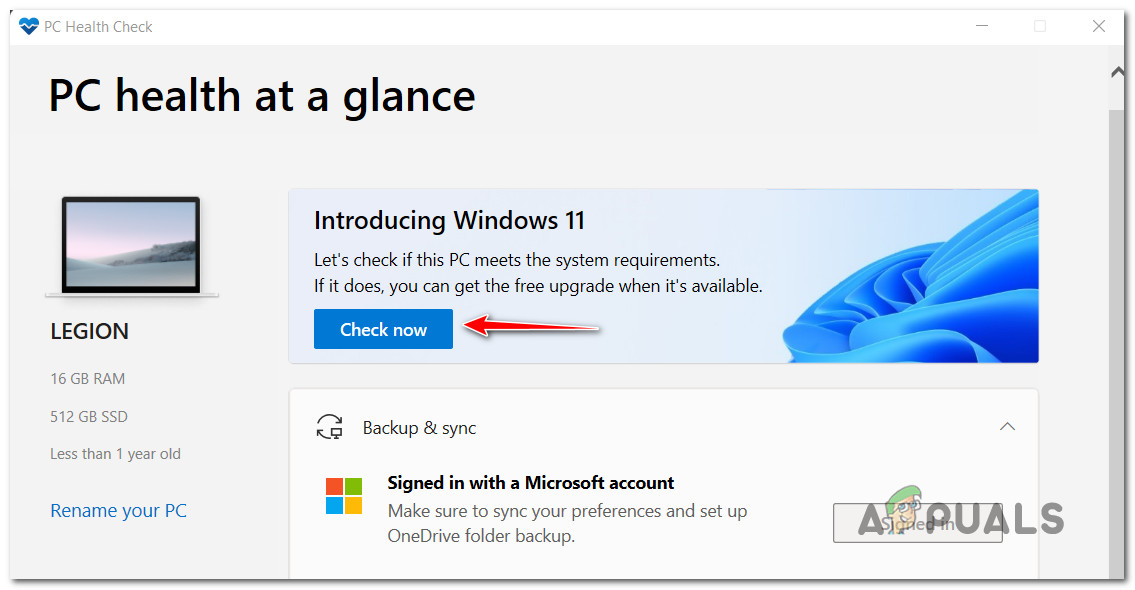
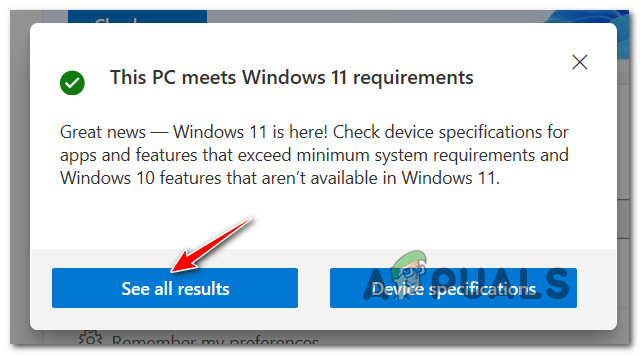
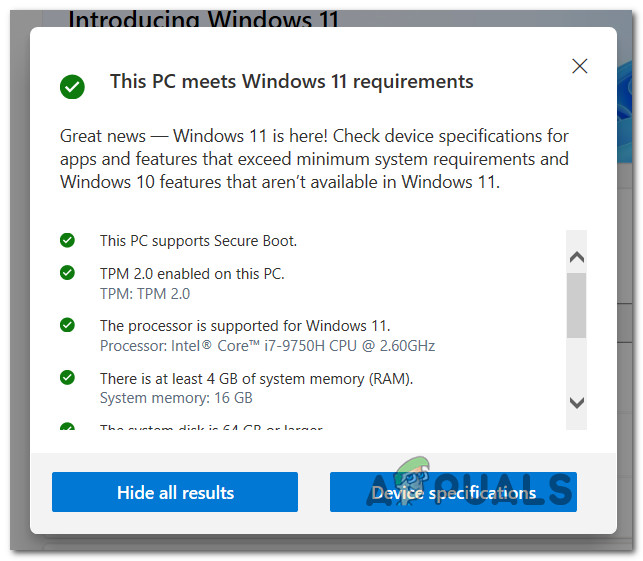
Since segmentation is a big issue with Windows 11 right now, the first thing you need to check is if your system is truly capable of Windows 11 or not. Microsoft surprised a lot of people by making TPM 2.0 and Secure boot a requirement for Windows 11 – along with a few other hardware requirements that are easier to meet. Fortunately, in case you’re not certain if your PC configuration is compatible with Windows 11 or not, you can run a Microsoft app called PC Health Check to see if your computer meets the minimum requirements to run Windows 11. Note: This app was initially pulled after showing false negatives with certain configurations, but now Microsoft has patched it and it’s ready to be used. In case you haven’t done this yet, follow the instructions below to start this troubleshooting guide by checking if your PC meets the minimum Windows 11 requirements: After you’re done with this tool and you know if your PC is compatible or not with Windows 11, you can uninstall the PC Health Checker tool via Program and Features. Once you’ve ruled out a potential software or hardware incompatibility from your culprit’s list, move down to the next method below.
Run the Windows Update Troubleshooter
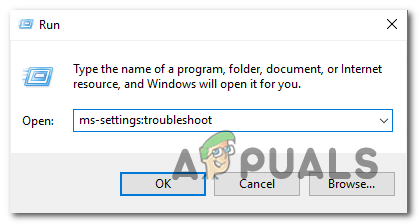
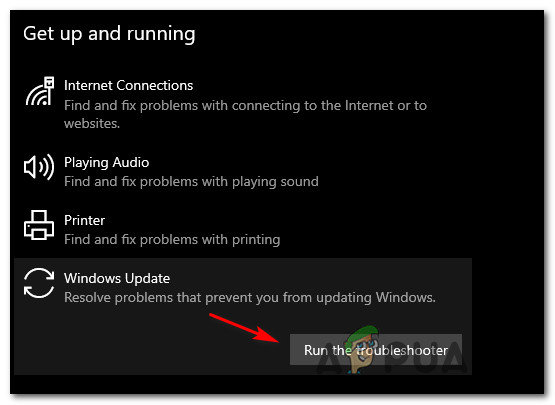
Now that you’ve confirmed that your PC is fully compatible with Windows 11, the next thing you should do is ensure that you’re not actually dealing with a corrupted Windows Update component that might be preventing the upgrade to Windows 11 from taking place. Since there are multiple potential causes that might hinder the functionality of Windows Update, the best course of action would be to run the Windows Update Troubleshooter and see if it detects any issues that might affect the installation of a new pending update – in this case the update that upgrades your OS to Windows 11. Note: Windows Update Troubleshooter contains a selection of automated repair strategies that will be applied automatically if the troubleshooter discovers a scenario that is applicable to one of the repair schemes included. Follow the instructions below to run the Windows Update Troubleshooter: If this new upgrade attempt fails with the same 0xC19001-0x40021 or the Windows Update Troubleshooter was not able to find an underlying WU component issue, move down to the next method below just to be sure.
Reset every WU component
Even if the Windows Update Troubleshooter was not able to find an underlying issue with the Windows Update component, that doesn’t mean there’s isn’t a corruption issue affecting this component. This is why we recommend that you take the time to reset every WU sub-component and every associated dependency on top of clearing the Catroot 2 and SoftwareDistribution folders in order to ensure that you’re not actually dealing with a corruption issue. To do this, you will need to run a series of commands in a specific order. These commands will ensure that you first stop every involved service before forcing WU to ignore the current folders where update files are stored. Follow the guide below for step by step instructions on how to do this: If the upgrading attempt still results in the same 0xC19001-0x40021 error, move down to the next potential fix below.
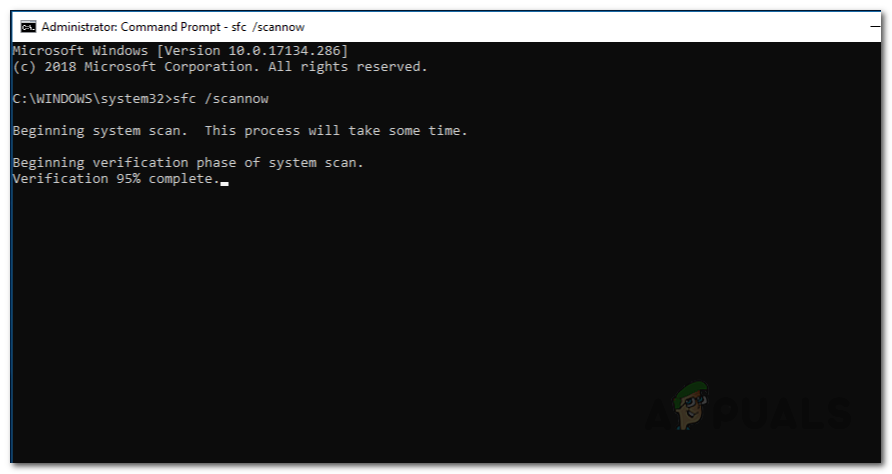
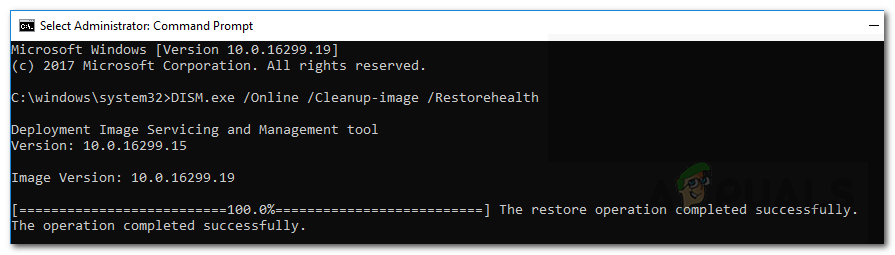
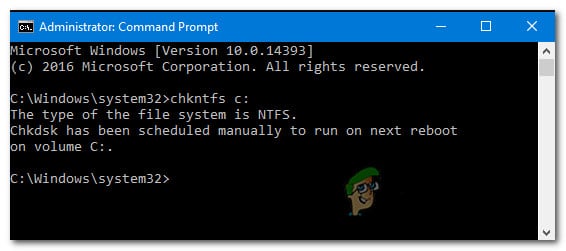
Run SFC, DISM, and CHKDSK Scans
In case you already tried resetting the Windows Update component and you’re still dealing with the same kind of error, you should at least assume that you might be dealing with some kind of system file corruption issue. In this case, you should make use of every available utility at your disposal to try and replace the corrupted files that are preventing the upgrade to Windows 11 and causing the 0xC19001-0x40021 error. Our recommendation is to run SFC (System File Checker), DISM (Deployment Image Servicing and Management), and CHDSK (Check Disk) scans utility in quick succession to replace corrupted system files with healthy equivalents and replace failing storage sectors with unused equivalents. For the complete instructions on doing this, follow the guide below:
Downgrading to an older Windows 10 build (if applicable)
If none of the methods below have worked in your case, one thing you can also try is to downgrade your current version of Windows 10 version to an older build first before re-trying the upgrade to Windows 11. As some affected users have been reporting, you can expect to face this issue in a situation where you’re still on an Insider build of Windows 10 where the upgrade is not possible. In this case, downgrading your Windows 11 version to a build released prior to March 20 should ensure that you can upgrade easily without seeing the same 0xC19001-0x40021 error. Follow the instructions below for the complete guide of downgrading to an older Windows 10 build before re-initiating the upgrade to Windows 11: In case the upgrade attempt gets interrupted by the same 0xc1900101-0x40021 error, move down to the next method below.
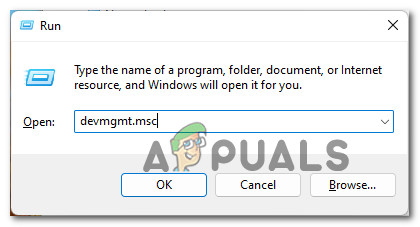
Uninstall Asus Xonar Driver prior to upgrading (if applicable)
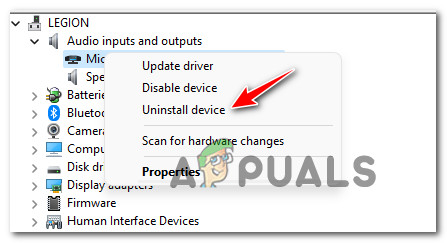
If you’re using ASUS hardware, you should know that there is one drive that’s known to conflict with the upgrading process to Windows 11. It’s called ASUS Xonar Driver and a lot of users are blaming it for causing an interference with the Windows Update Assistant resulting in the error-0xc1900101-0x40021. In case you find this scenario to be applicable, you can resolve the interference by using Device Manager to uninstall every driver related to ASUS Xonar. This method is confirmed to work by a lot of Windows 10 users that we’re encountering this issue while using ASUS hardware. Follow the steps below for complete instructions on uninstalling the ASUS Xonar driver in order to allow the upgrade to Windows 11 to take place: In case the problem is still not resolved, move down to the next method below.
Disable DRM software that interferes with the Win 11 upgrade (if applicable)
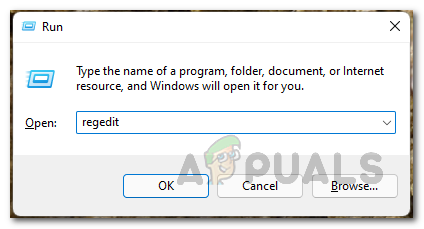
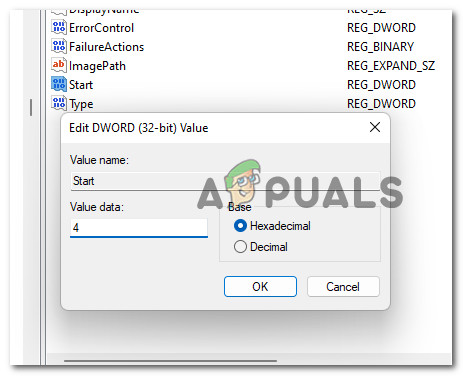
Another scenario that we’ve discovered as a potential culprit for triggering the 0xc1900101 error during a Windows 11 upgrade attempt is an interfering piece of DRM software called Aladdin Knowledge Systems. If you have this installed, you should know that this is a legacy program that is in no way relevant since the parent company was acquired by SafeNet in 2009. You might find this digital rights management (DRM) module with certain legacy games, but since you really don’t need it anymore (and since it interferes with Windows 11’s upgrade assistant tool), you can use Registry Editor to ensure that this DRM module remains disabled. If this scenario is applicable, follow the instructions below to navigate to the Reg key belonging to Aladdin Knowledge Systems and disable the DRM functionality in order to fix the 0xc1900101 0x40021 error. Here’s what you need to do:
Disable Antivirus Temporarily (if applicable)
As it turns out, another likely culprit that causes this problem is an interfering 3rd party software that denies some permissions to the Windows 11 setup upgrade. This problem is typically reported to occur with Zone Alarm, but there might be other 3rd party antivirus suites that will cause similar behavior. If you’re using a 3rd party AV, it wouldn’t hurt to temporarily disable the real-time protection of your AV and check if the Windows 11 upgrade is successful while the security suite is disabled. Note: Most AV suites will allow you to disable the real-time protection directly via the taskbar icon. If that’s not possible, you should be able to find an option to disable the currently active AV shields from the Settings menu. Additionally, you can also consider uninstalling the 3rd party suite altogether – particularly if you’re using an AV suite that also doubles down as a firewall. In case this method is not applicable, move down to the next potential fix below.
Remove secondary SSD and any external devices (if applicable)
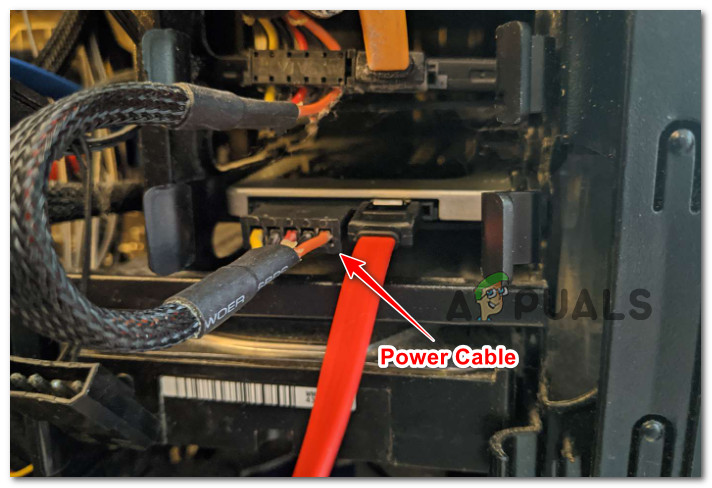
Keep in mind that it’s not uncommon to face the 0xc1900101 error while attempting to upgrade to Windows 11 while certain external SSDs are connected. There is no official explanation on why this happens, but we found at least a dozen different reports where affected users said that the Windows 11 update was finally installed after they made sure to remove any external SSD, HDD, along with any other non-essential peripherals. If this scenario is applicable, simply disconnect any unessential device from your USB ports. Additionally, if you’re using a secondary drive (where Windows doesn’t have any system files installed on), disconnect that drive too by removing the case and disconnecting the power cable to it. After you disconnect every non-essential device from your PC, retry the upgrade operation and see if you manage to bypass the 0xc1900101 error. If none of the methods shown above worked for you at all you can try to bypass Windows 11 system requirements and Install Windows 11.
How to Fix Error 0x8007007e When Upgrading to Windows 10Fix: Error 0xc0000409 when Upgrading or Installing WindowsFix ‘Error Code: 0x8030002F’ When Installing or Upgrading Windows?How to Fix 0x4005(16389) Error When Upgrading Windows?